
GC Home | Register | Shop | Learn | Business | Around Town | Info
Materials Needed: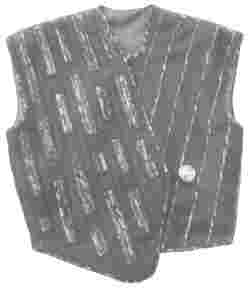
-- Vest pattern of your choice
Note: The asymmetrical vest pattern I used in this design is one
that I have created from
combining several patterns. It has an extended shoulder
( 9' from the neck along the shoulder seam to the armseye).
-- 1 yard of sweater knit (or other fabric) for garment back and decorative
rectangles on vest front
-- 1/8 yard of Ultrasuede (cut in 1/4" wide strips) or about 20 yards of
1/4" wide, bias fabric tubes
-- One 1 1/4" decorative button
-- Approximately 18 yards of yarn pulled from the sweater knit for couching on
left vest front
-- Clear monofilament thread
-- Thread to march fabrics
-- Fusible tricot interfacing for vest fronts and back
-- 4 1/2 yards of 1/4" wide Steam-A-Seam 2
-- 4 mm double needle
-- Tailor's chalk
-- 24" clear ruler
-- Tear away stabilizer
Cutting:
1) Cut the vest fronts and back from fusible interfacing press to the wrong side of the sweater knit.
2) Cut the vest back from the sweater knit, following the outline of the fused interfacing, truing the pattern if necessary. Note: Use any existing sweater ribbed edge along the vest back lower edge, eliminating the need for a hem allowance.
3) Cut the vest fronts and press fusible interfacing to the wrong side of each.
4) Cut 4 yards 1 1/4" wide bias for binding from the fabric used for the vest fronts; piece as needed. Press fusible interfacing scraps to the wrong side of remaining sweater knot and cut into 1" wide strips.
5) Cut lining for the vest fronts and back
Marking and preparing for stitching:
 1)
Using tailor's chalk and a clear ruler, mark diagonal lines parallel to the vest
front edges, beginning 1" from the front and every inch across the pieces. Note:
On the vest right front, the decorative knit rectangles will be positioned
between the guide lines. Spaces between the rectangles may vary and the length
of the rectangles should vary for interest..
1)
Using tailor's chalk and a clear ruler, mark diagonal lines parallel to the vest
front edges, beginning 1" from the front and every inch across the pieces. Note:
On the vest right front, the decorative knit rectangles will be positioned
between the guide lines. Spaces between the rectangles may vary and the length
of the rectangles should vary for interest..
Embellishing the left front:
1) thread the machine with clear monofilament in top, regular thread in the bobbin and set your machine for zigzag. Back the vest front with tear-away stabilizer. Test tension settings to avoid distortion.
2) Divide the yarn into three equal lengths and gently twist the three strands together.
3) Position the twisted yarns directly over the diagonal guidelines and couch it into place.
Embellishing the vest right front;
 1)
Back knit rectangles with a strip of Steam-A-Seam 2 to prevent shifting.
1)
Back knit rectangles with a strip of Steam-A-Seam 2 to prevent shifting.
2) Position the cut knit rectangles on the right front, varying lengths and distances between them. Eliminate excess bulk by keeping rectangles away from the seam allowances at the vest lower edge, however they may extend into the side shoulder seams. Pin each knit rectangle securely into place and zigzag around it.
3) Back the 1/4" wide Ultrasuede strips with Steam-A-Seam2. Peel the protective backing from it and cover the top and bottom of each rectangle with the Ultrasuede strips or bias tubing, being sure to cover the knit edges completely.
4) Using a double needle, topstitch the end strips of each rectangle.
5) Position Ultrasuede strips or bias tubing over the diagonal guide lines, completely covering the knit rectangle edges; press in place. Topstitch each strip into place using the double needle.
Finishing the vest:
1) Make custom piping by covering the cotton cording with the precut bias strips.
2) Sew piping to vest and armhole edges.
3) Make a buttonhole loop from Ultrasuede strips and secure to vest front.
4) Complete the vest, securing the lining and piping as you go.
Note:
Through the years I've found that asymmetrical, single button vests seldom hang properly and stay closed evenly when an under-lap button is used. Solve this problem by sewing hook-and-loop tape in the following two spots:
Position a 3/4" square of hook tape on the left vest front, just below the center front point where the right vest should cross over. Place a second square of hook tape just above the point where the vest fronts no longer overlap. Try the vest on and place a pin directly opposite each piece of hook tape. Remove the vest and secure the squares in place with hand stitches. I have found that by placing the hook tape facing away from the body, it doesn't get caught on or damage my other clothes or the vest lining. I slip on the vest, position the loop around the button and then gently press against the hook-and-loop tape. The garment remains perfectly positioned even if the hook-and-loop tapes only catch together at a corner.
More information on Total Embellishments
Back to the Get Creative! Conference Center
Back to Meet the Get Creative! Experts
|
GetCreativeShow.com
| [email protected]
www.GetCreativeShow.com
Advertisers & Virtual Advantage Web Design Clients |
||
|
SEWING
& QUILTING: A Stitch in Time Quilting Abby's Attic Quilting & Fabric Blossom Quiltworks Buggy Barn Quilts Carriage Country Quilts Charlotte's Sew Natural Cozy Kitten Quilts Deborah Gayle Sales Flamingo Island Designs LLC Fat Quarter Quilters Front Porch Quilts GreatPond Quilts LLC Grandmas Attic Quilting Judy's Barlup's Unique Techniques Karen's Kreations Let's Quilt Liberty Quilt Shop Londa's Sewing LS Boudreau Quilt Fabric Store Mendon Village Muggin's Designer Hats My
Quilt Shoppe
|
SEWING
& QUILTING: Quilting Search Quiltmakers Quilt Shop Quilts by the Bay SAF-T-POCKETS Sewing Gallery Sew Bee It Sew Many Options Tours Silhouette Patterns Stacey's Quilty Conscience Sundrop Textiles Sunflower Quilts Suzanne's Quilt Shop Texas Quiltworks The Quilting Circle The Quilted Crow Tiny Stitches Weather or Not Fabrics VA Quilt Shops Virtual Advantage Quilt Shop Resource VonZensenburg Quilts York Street Quilting Co. CRAFTS
& NEEDLEWORK: |
OTHER
VA CLIENTS: BC Holstein News Cedarland Forest Products Clearbrook Brewing Davit Systems Demo GoldenSilencer.com Silencer Products Int. Heat Safe Industries Kodiak Ranch Lake Tahoe House Rental BC Fishing Resorts BC Fishing Directory BC Fishing Derby Resource BC Sport Fish, BC Sport Fishing Salmon Sports BC Fishing BajaSportFishing Cabo Sportfishing Tide Exchange Beachcombers Marina Kaslo Bay Resort & Condo Dev Mary's Gunns Riverside Golf Highland Powder Skiing Blackfish Marine Blackfish Desert Race Baja 1000 Fairview Electrolysis RealEstateBuySell Silva Panel S'more Camping Please Lighting Store.ca Coast Spas
|